

Setting Event Permissions
Last updated Jul 8, 2026
KAYAK for Business lets you control who can use the Events feature by assigning roles and permissions. This guide explains:
- Which default roles already include access to Events
- When you might need a custom role
Which roles already have access to Events?
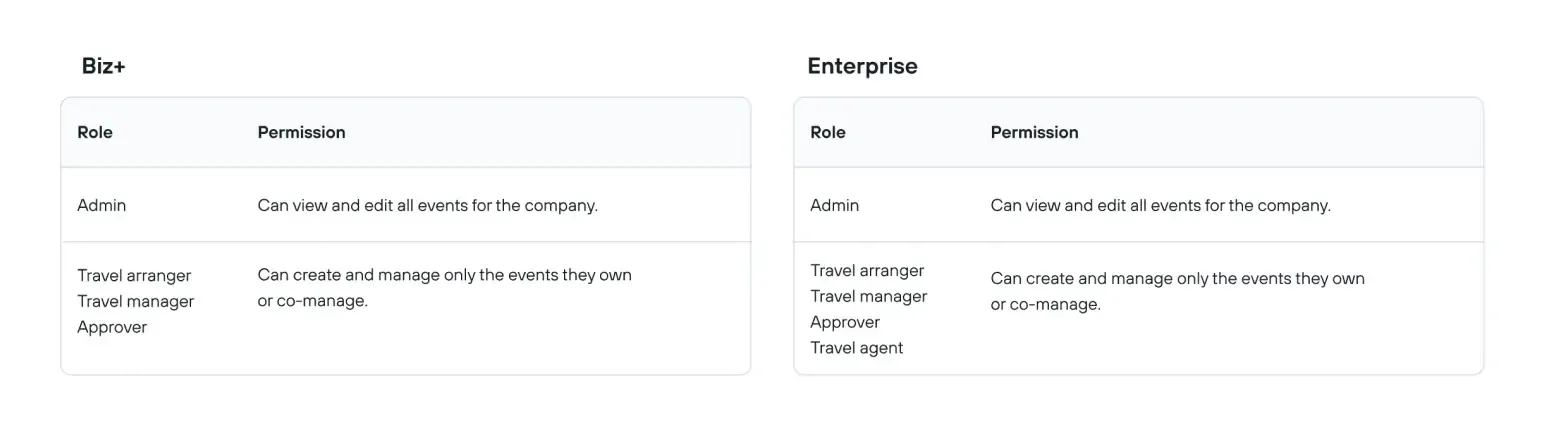
Some default roles in Kayak for Business already include Events access:
Tier: Biz+
In the Biz+ tier, Events access works as follows:
Permission: Can view and edit all events for the company.
Role: Admin
Permission: Can create and manage only the events they own or co-manage.
Roles: Travel Arranger, Travel Manager, Approver
Tier: Enterprise
In the Enterprise tier, Events access works as follows:
Permission: Can view and edit all events for the company.
Role: Admin
Permission: Can create and manage only the events they own or co-manage.
Roles: Travel Arranger, Travel Manager, Travel Agent, Approver
When should I create a custom role?
Create a custom role if you want to:
- Give Events access to users who are not covered by the existing roles, or
- Fine‑tune what they can do in Events (for example, view only, or manage only their own events), and
- Combine Events access with other permissions (such as booking travel for themselves, company travelers, or guests).
How to create a custom role with Events access
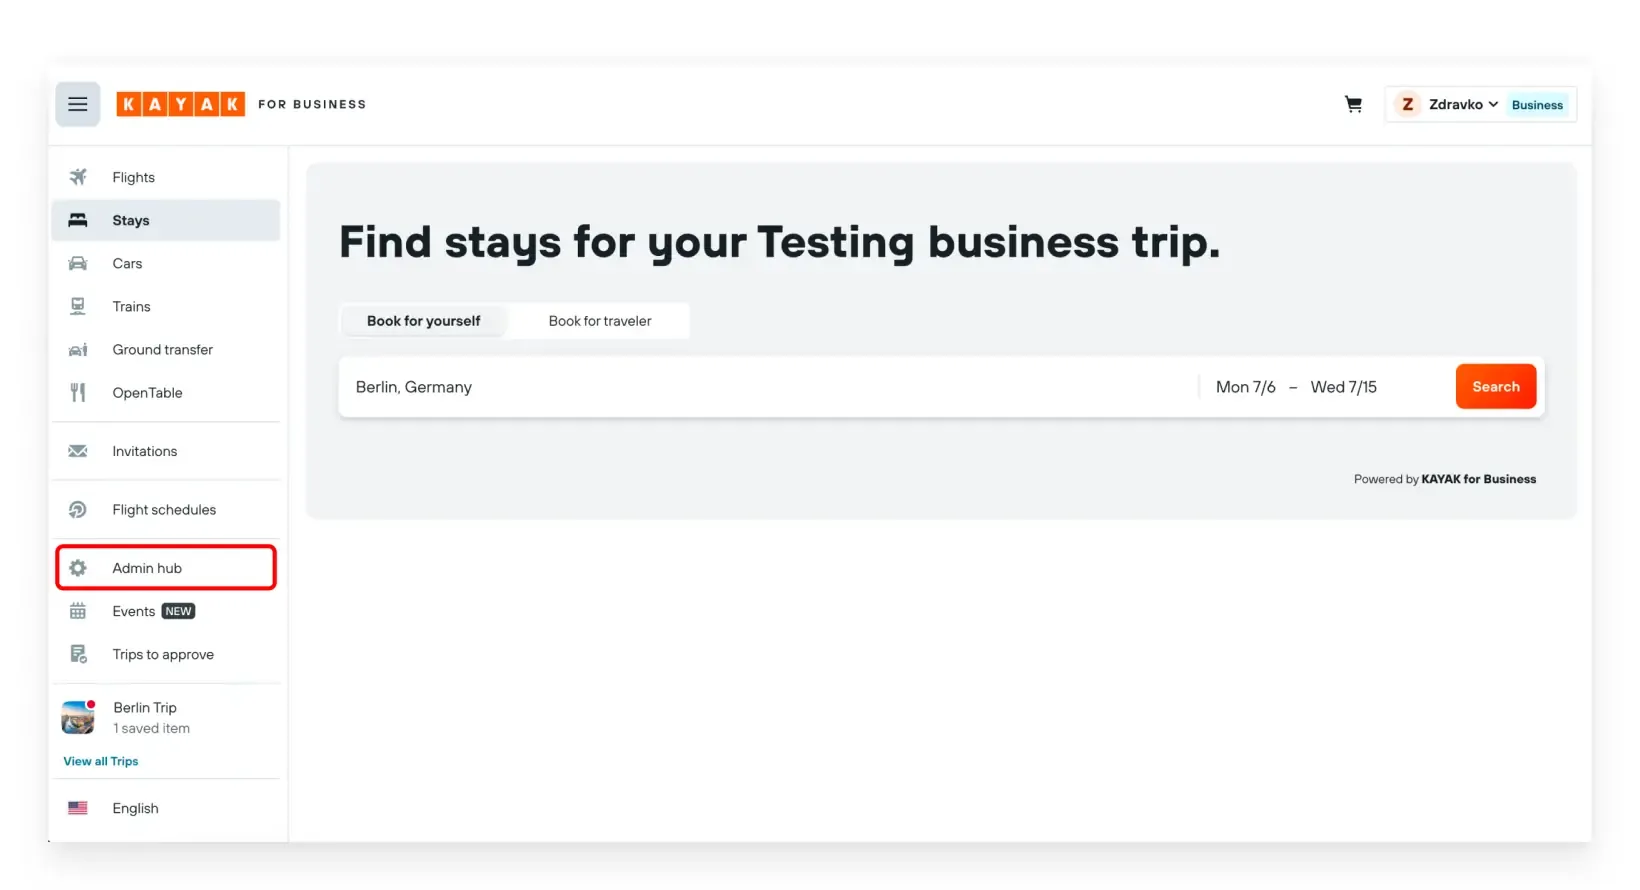
1. Go to Admin Hub
Open Kayak for Business and click on “Admin Hub” to access your company settings.
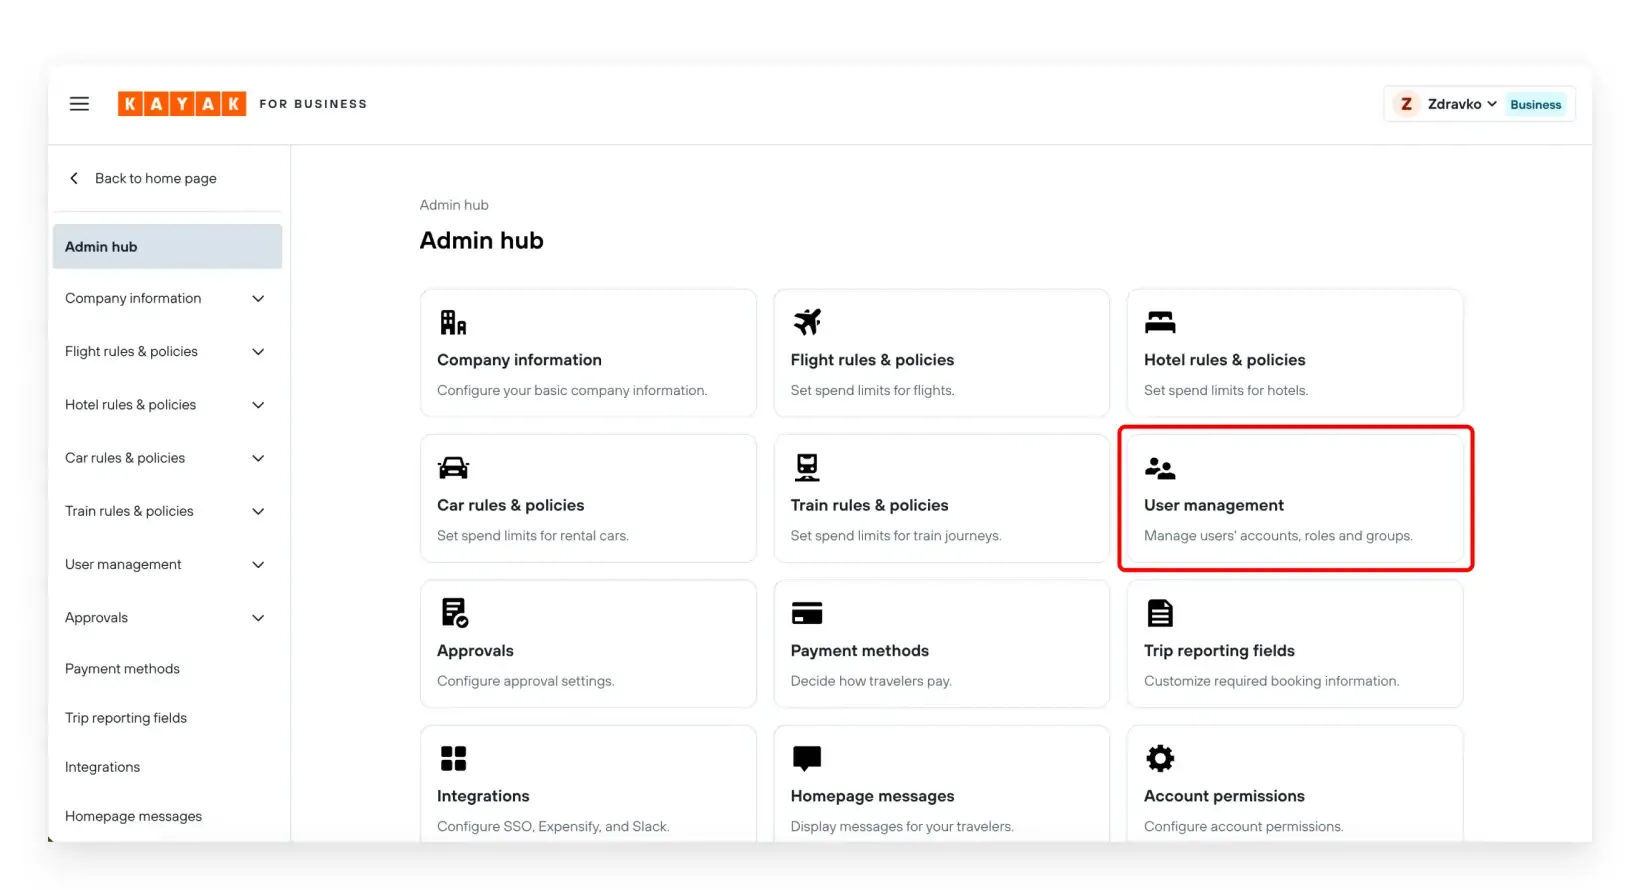
2. Open User Management
In the Admin Hub, go to “User Management” to see and manage users and their roles.
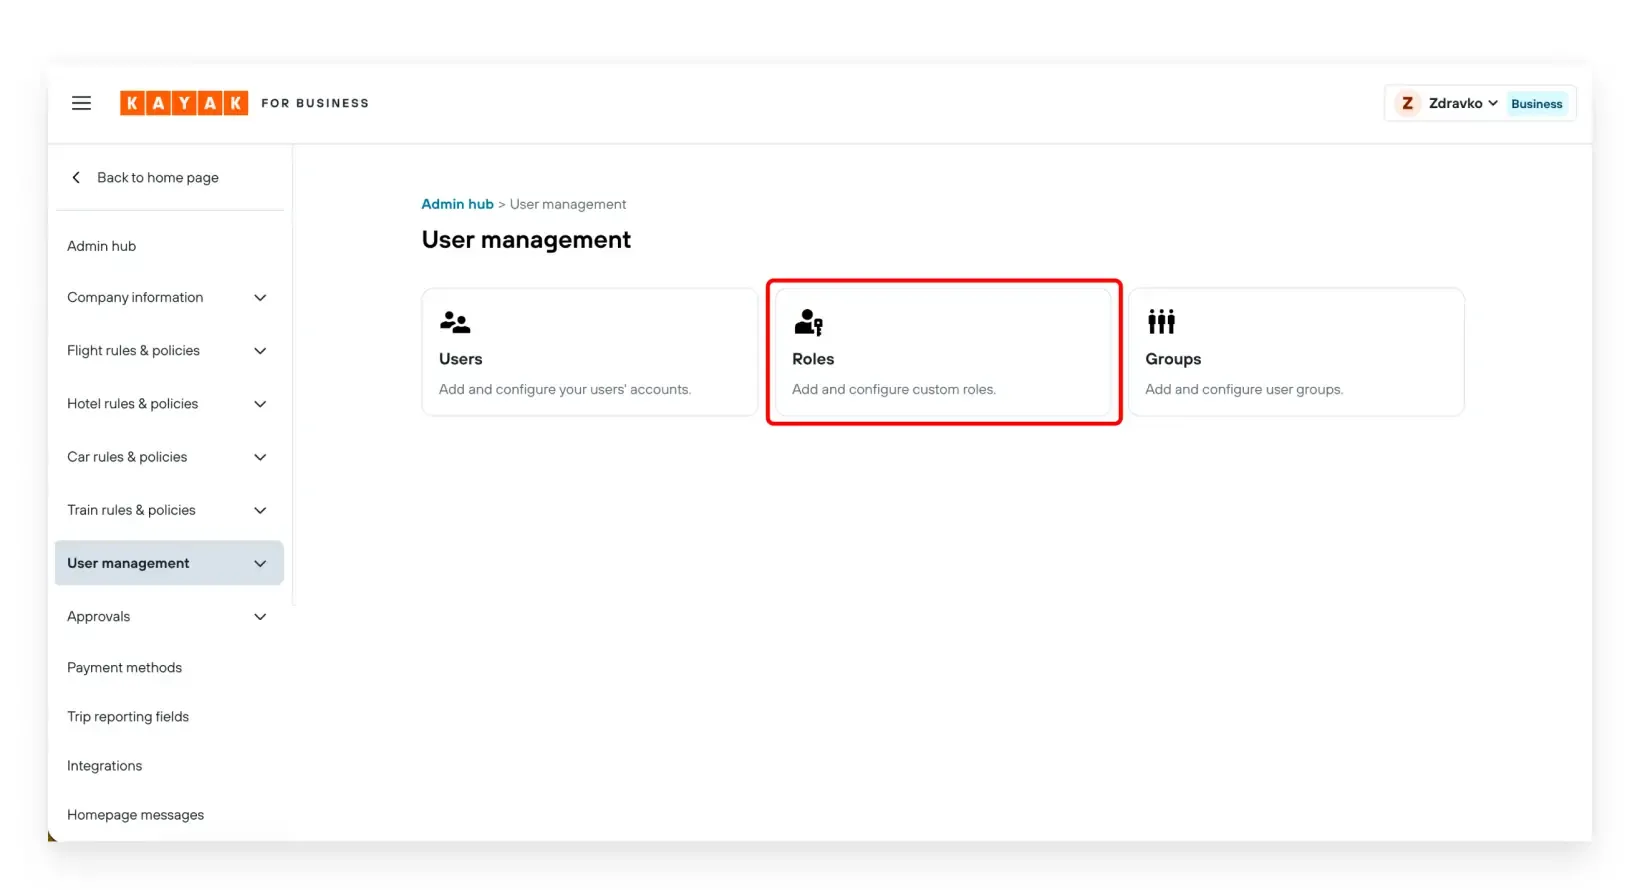
3. Open the Roles section
Click on “Roles” to see all roles available for your company.
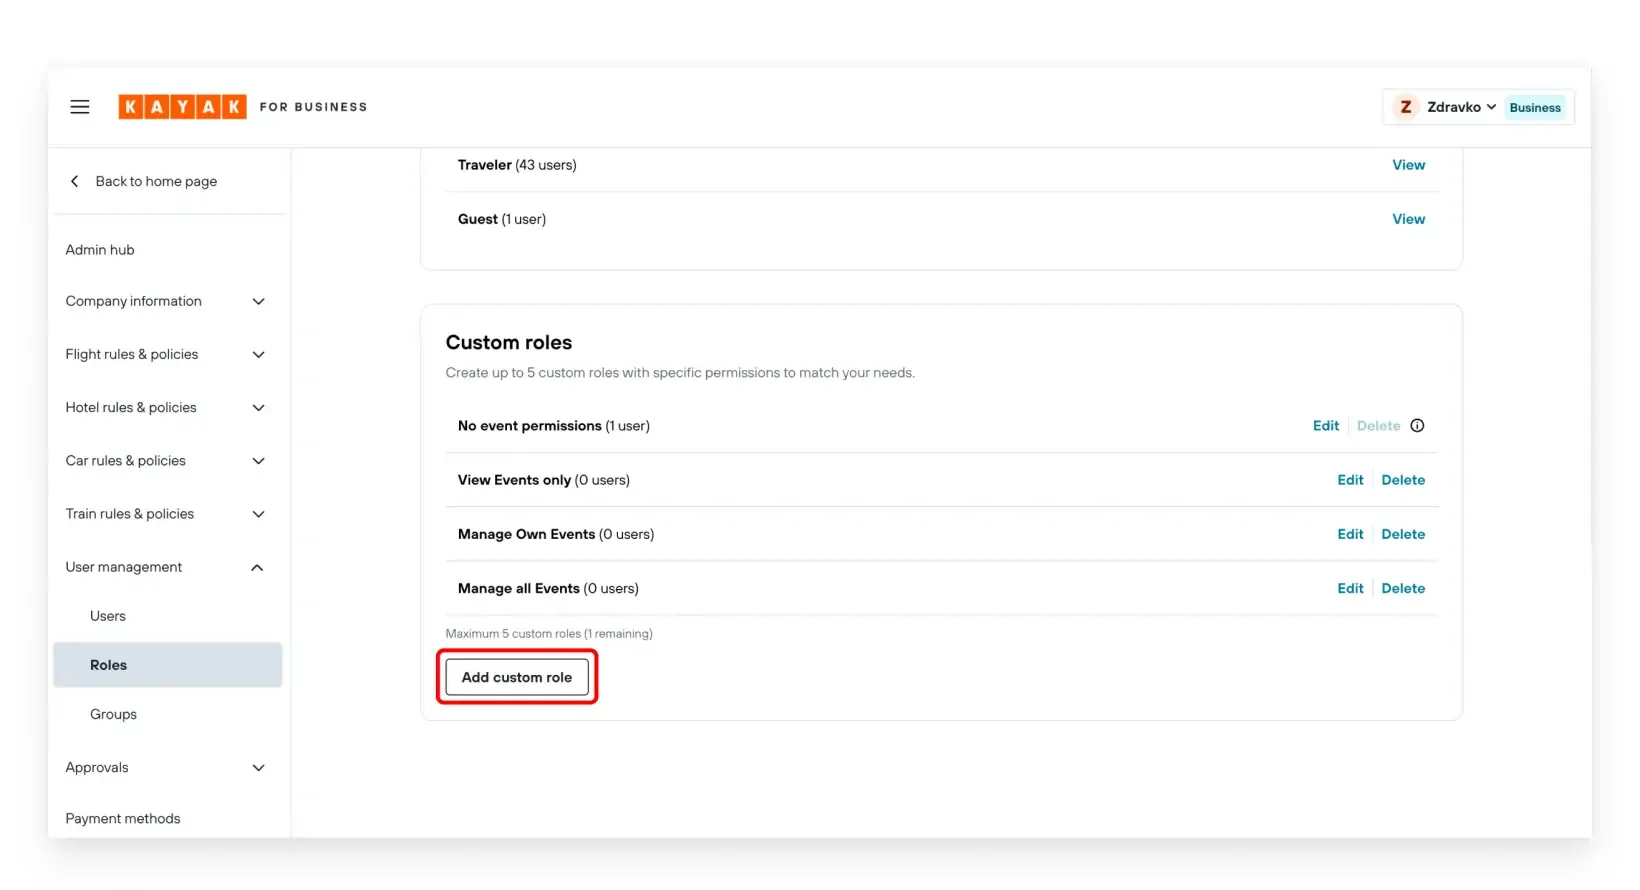
4. Create a new custom role
Click on “Custom Role” to start creating a new role.
5. Name the role
Give the role a clear, descriptive name so that its purpose is obvious later. For example:
- “Events – View Only”
- “Events – Manage All”
- “Travel Arranger + Events Editor”
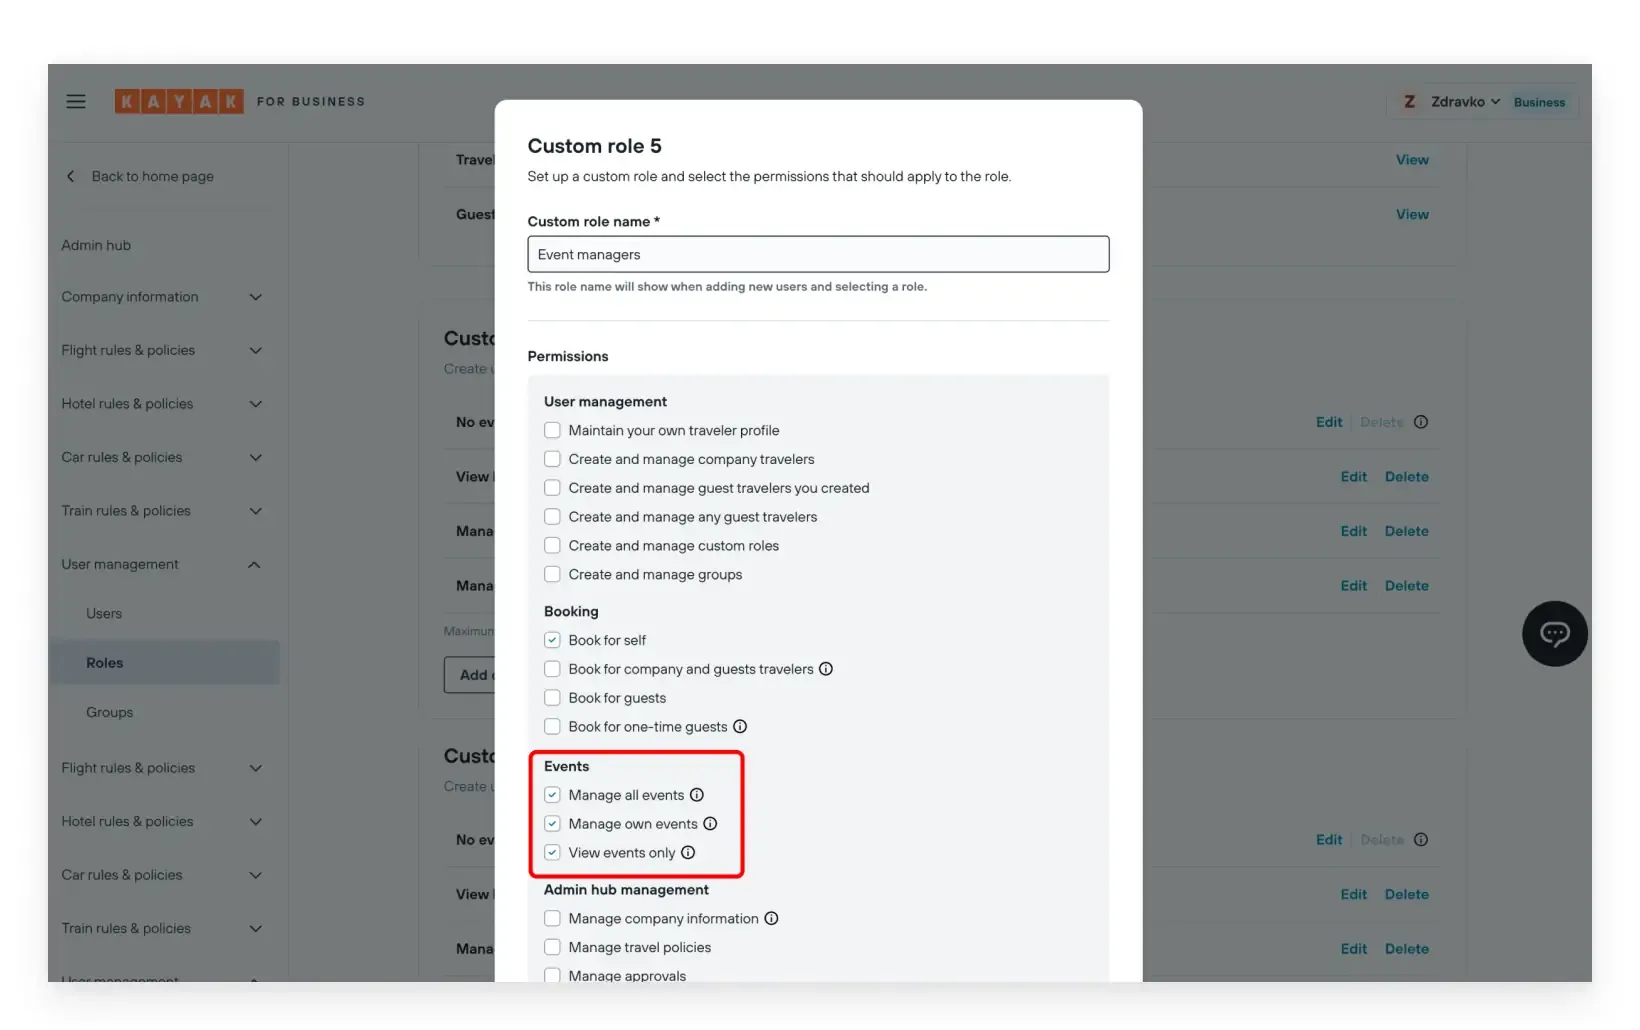
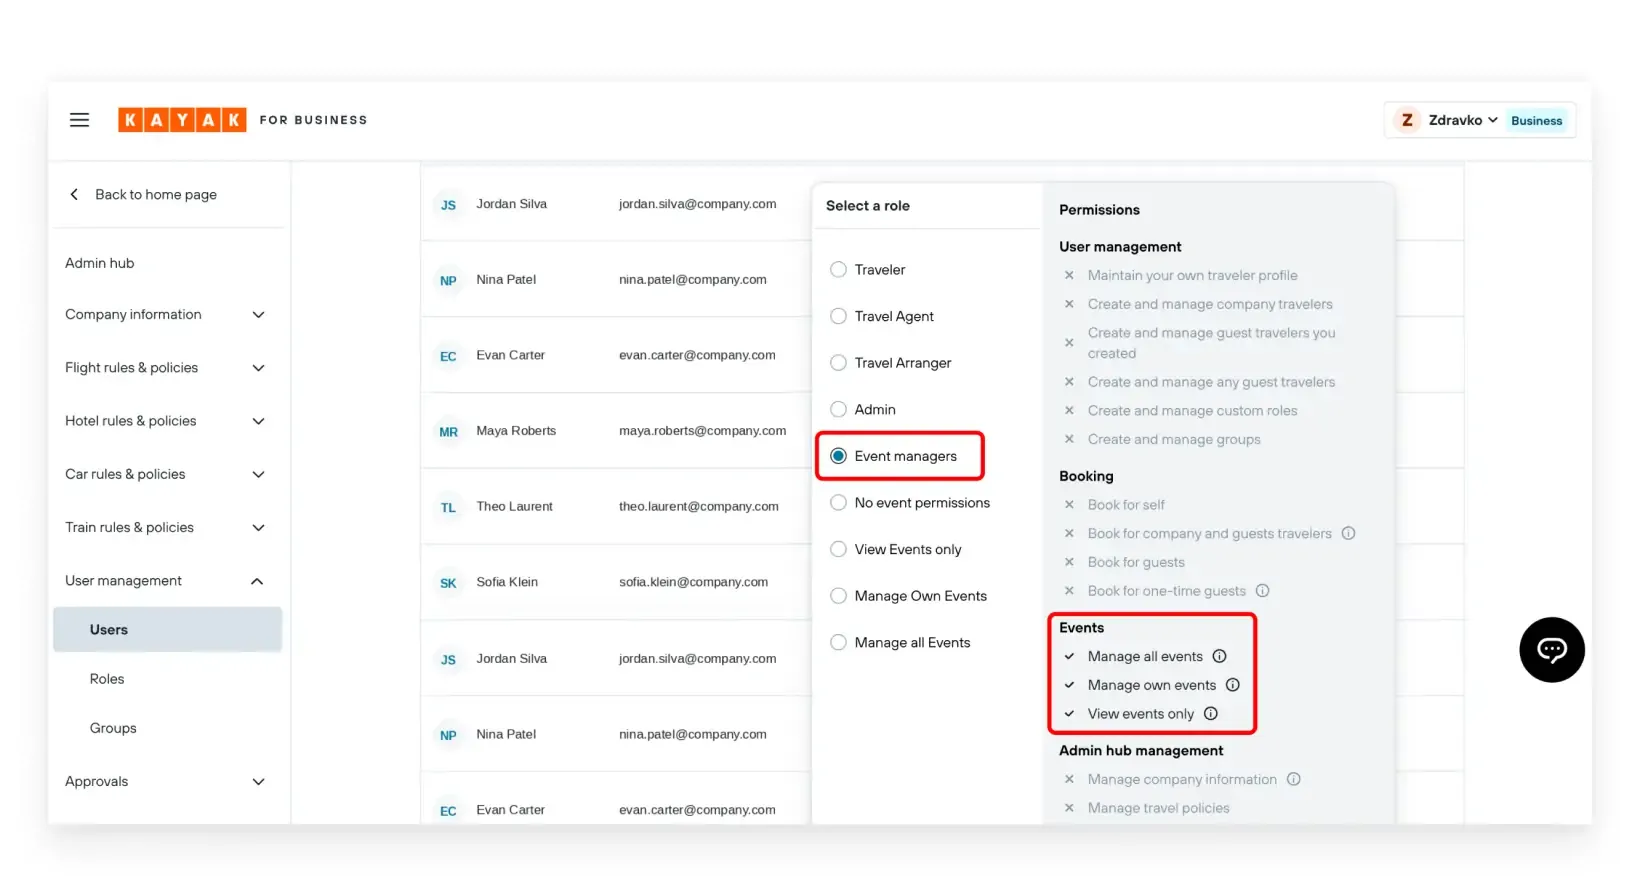
6. Set Events permissions
Scroll to the Events section. You will see three options:
Manage all events
- Users can create, edit, delete, and view any event in the company.
- Use this for central event owners or admins.
Manage own events
- Users can create, edit, delete, and view only events they own or co‑manage.
- They cannot see or edit other company events they are not managing.
- Use this when you want limited or local event ownership.
View events only
- Users can view all company events in read‑only mode.
- They cannot create, edit, or delete events.
- Use this for stakeholders who only need visibility.
7. Add any other permissions the user needs
While you are editing the custom role, also select all non‑Events permissions the user should have (for example):
- “Book for self”
- “Book for company travelers”
- “Book for guest travelers”
8. The custom role will define everything the user can do after you assign it
Their previous role will no longer apply.
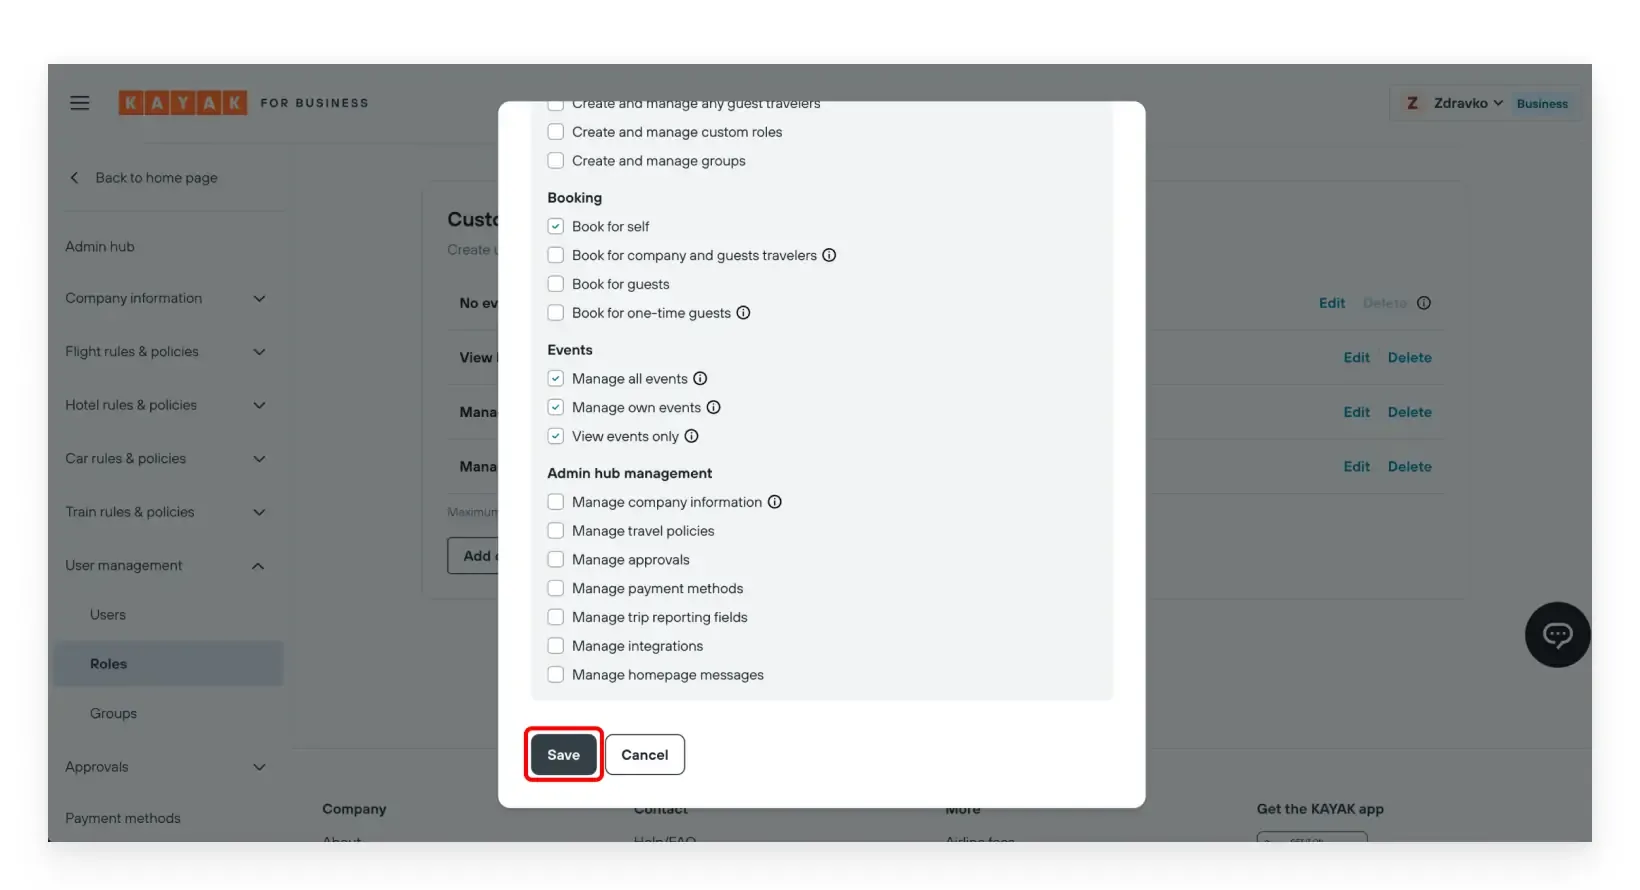
9. Save the role
Click “Save” to create the new custom role.
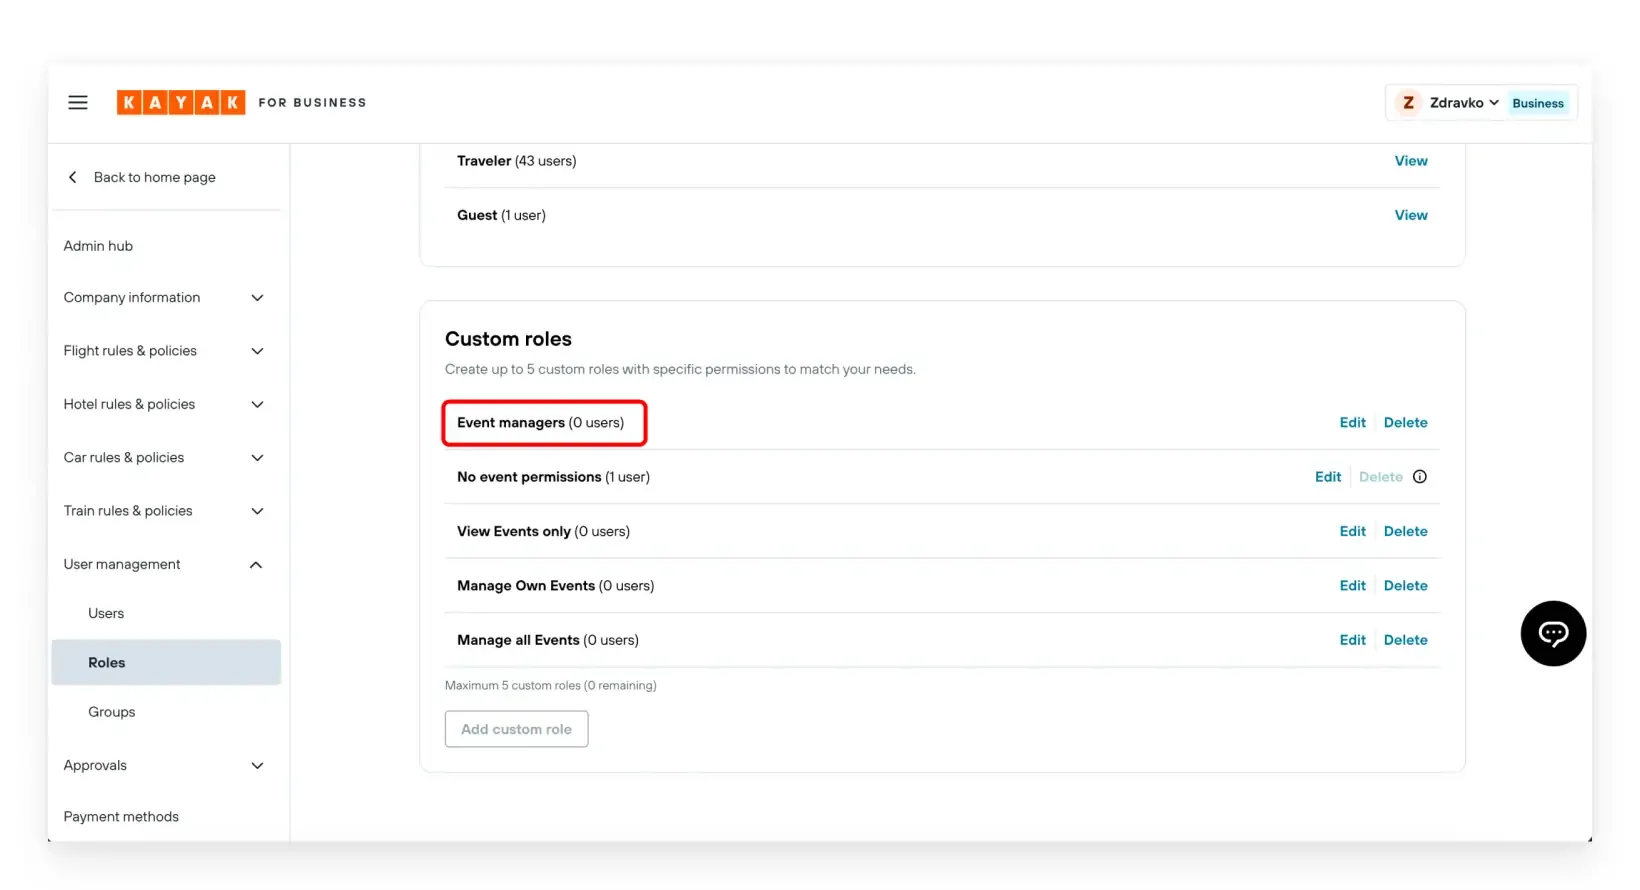
Assign the custom role to users
After creating the role, you must assign it to users:
1. Go back to “User Management”
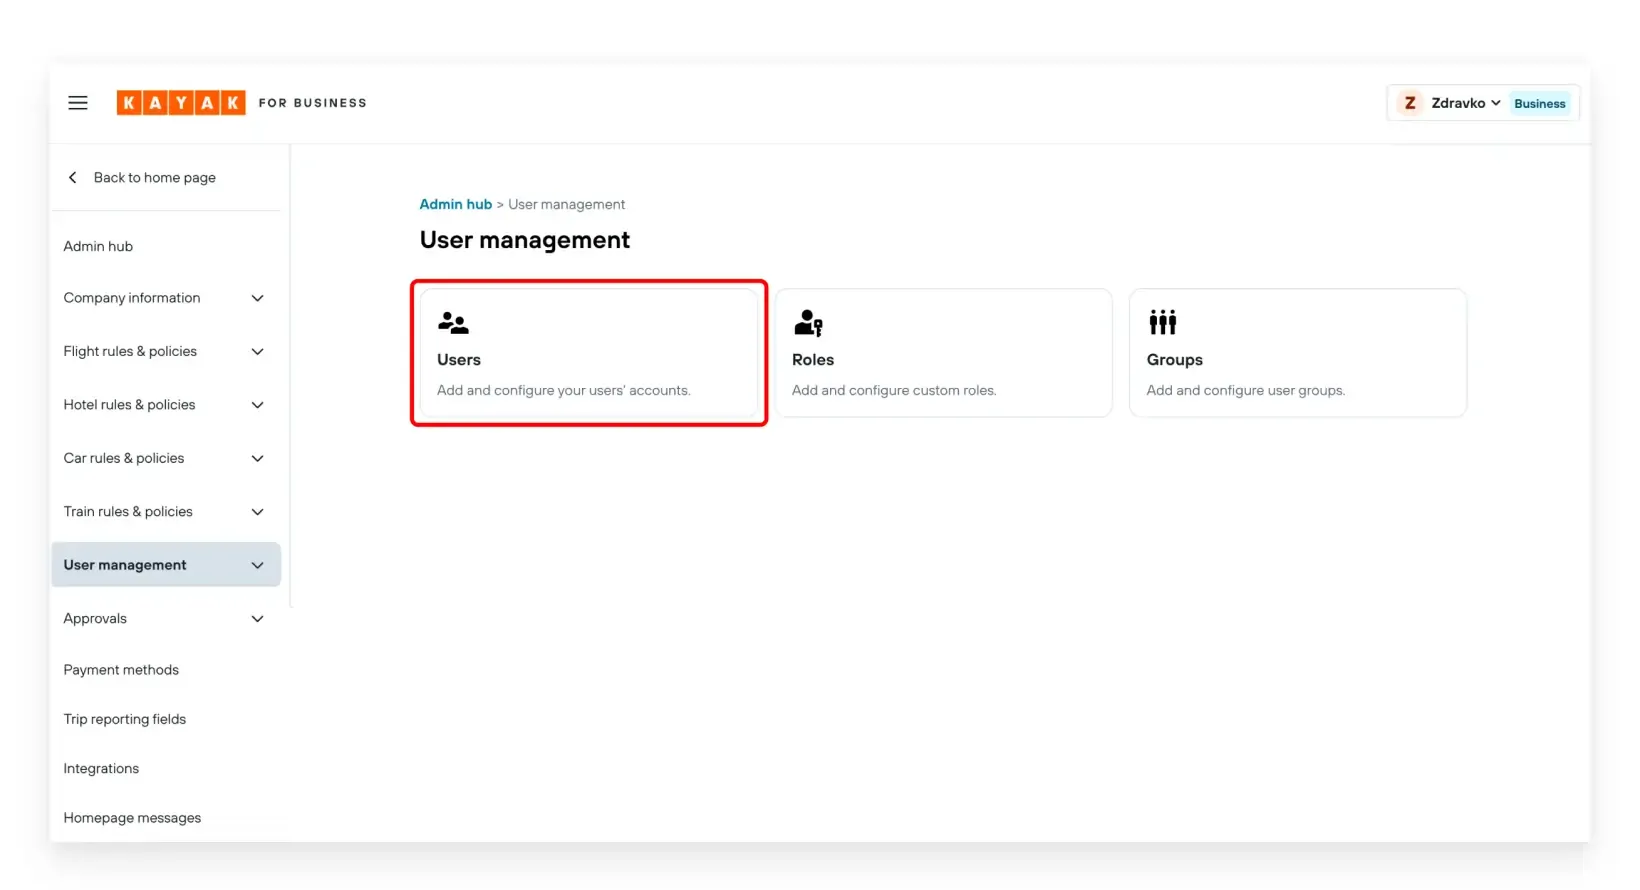
2. Open the profile of the user you want to update
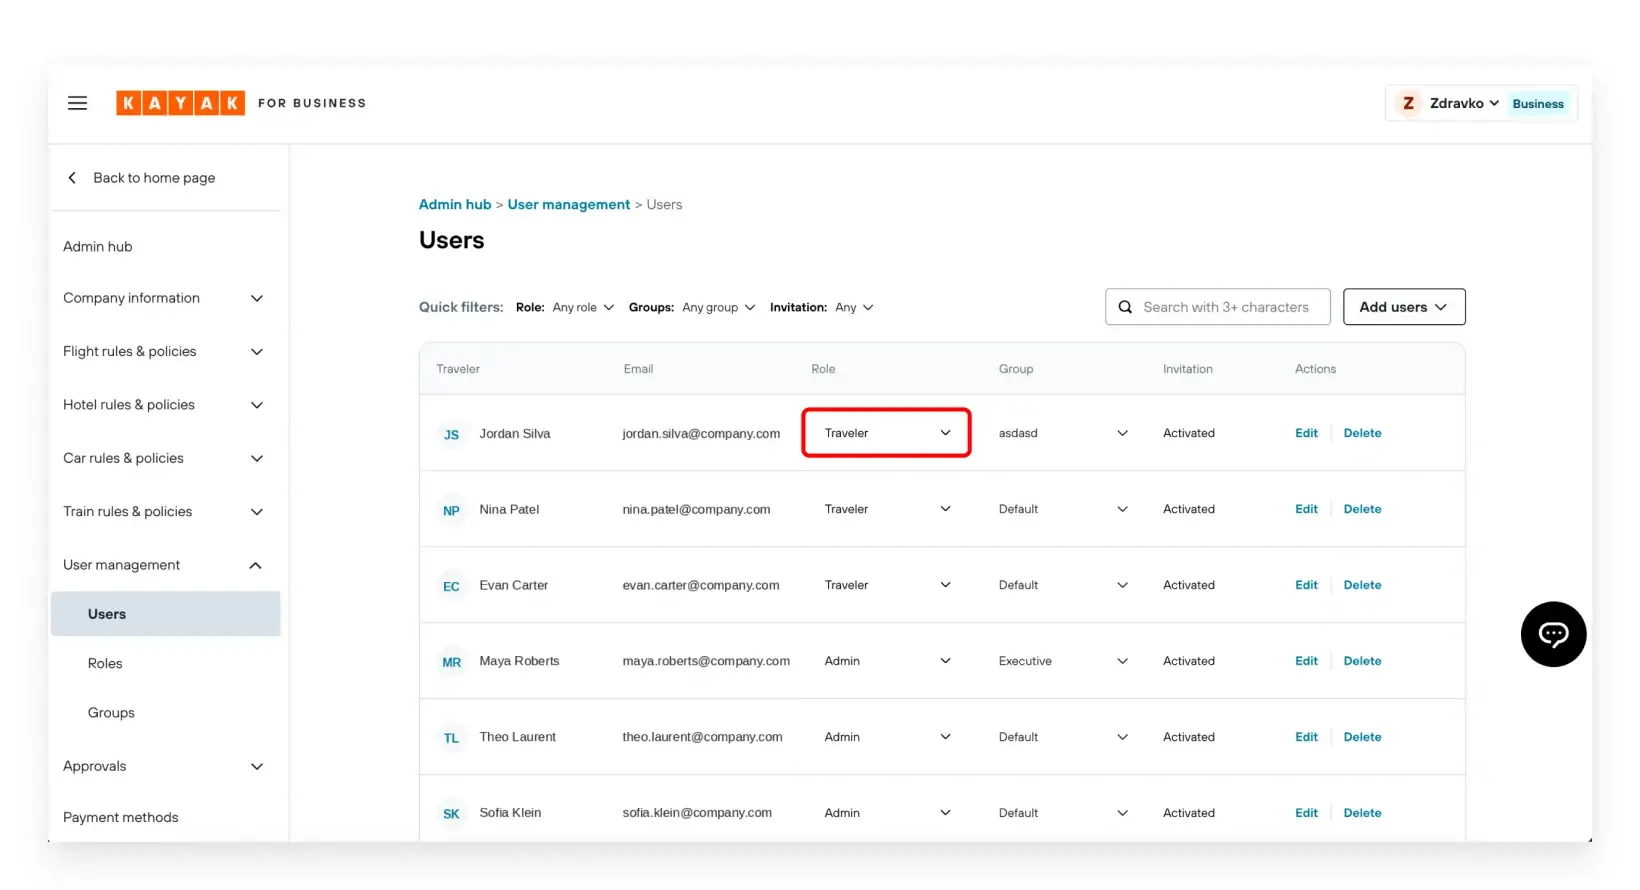
3. Change their role to the new custom role you created, then save your changes
Important details
When you give a user a custom role, it replaces their old role. They keep only the permissions you include in the new role.
If you want users to keep their existing travel permissions and also gain Events access, you must select both:
- If you want users to keep their existing travel permissions and also gain Events access, you must select both:
- If you want users to keep their existing travel permissions and also gain Events access, you must select both:
Example:
- Current situation: The user is a Travel Arranger and can book trips for others.
- Goal: The user should keep their travel arranger abilities and also manage events.
When you create the custom role:
- Turn on the travel booking permissions they need.
- Turn on “Manage all events” or “Manage own events” depending on how much control they should have.
After you assign this new custom role, what they can do is defined entirely by this role (travel + events).
Summary
You can give the right people access to the Events feature in Kayak for Business, without accidentally removing other permissions they need by:
- Checking what the standard roles already provide, and
- Creating a custom role when you need more control, and
- Including both travel and Events permissions in that custom role.
Learn more about the additional features and settings available in KAYAK for Business.